Collecting Patron's Fines and Fees
Answer
Receiving Payment for Fines and Fees
The Patron Services page enables circulation desk operators to receive payments from patrons for fines and fees.
To receive payments:
- On the Patron Identification page (Fulfillment > Checkout/Checkin > Manage Patron Services), enter the patron’s name in the Scan patron’s ID or search for patron field and select Go. The Patron Services page appears.
- Select the Pay link to the right of the Active balance link. The pay link appears only when the operator is connected to a circulation desk ( see Library/Desk Selector in The Persistent Menu).
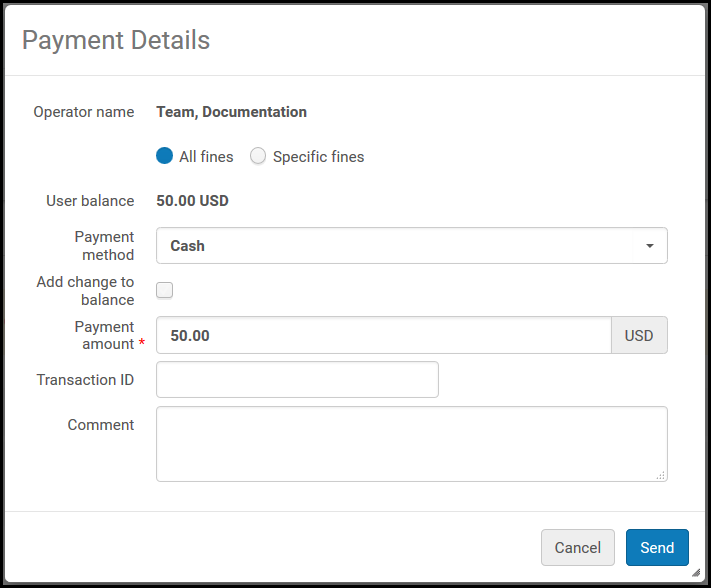
The Payment Details dialog box appears with the All Fines radio button selected as a default. This selection displays the entire outstanding balance in the payment amount.
 Payment Details Dialog Box
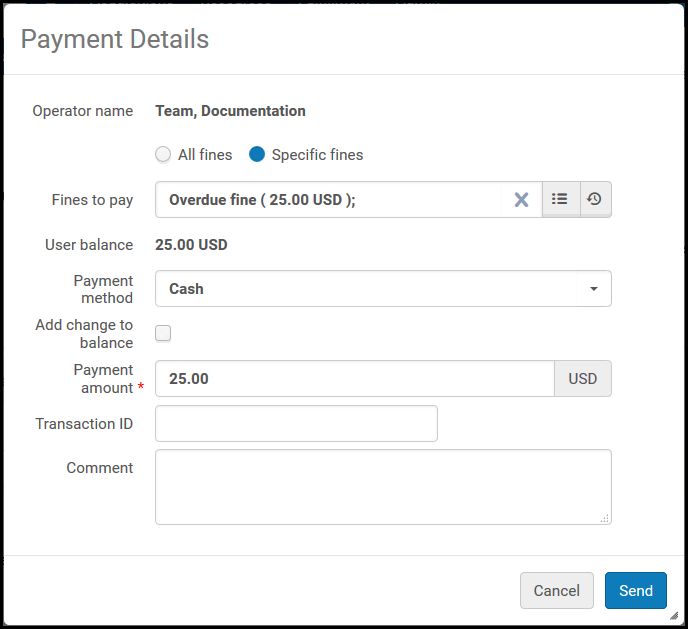
 - Under the Operator name, select whether you want to pay all of the patron’s fines (All fines), or only specific fines (Specific fines).
When selecting Specific fines, the Fines to pay field appears.
- Select the Browse icon to specify the specific fines to be paid. The User Fines and Fees page appears. You can filter the fines and fees display to show only fees for a specific fee owner in the Fee Owner filter.
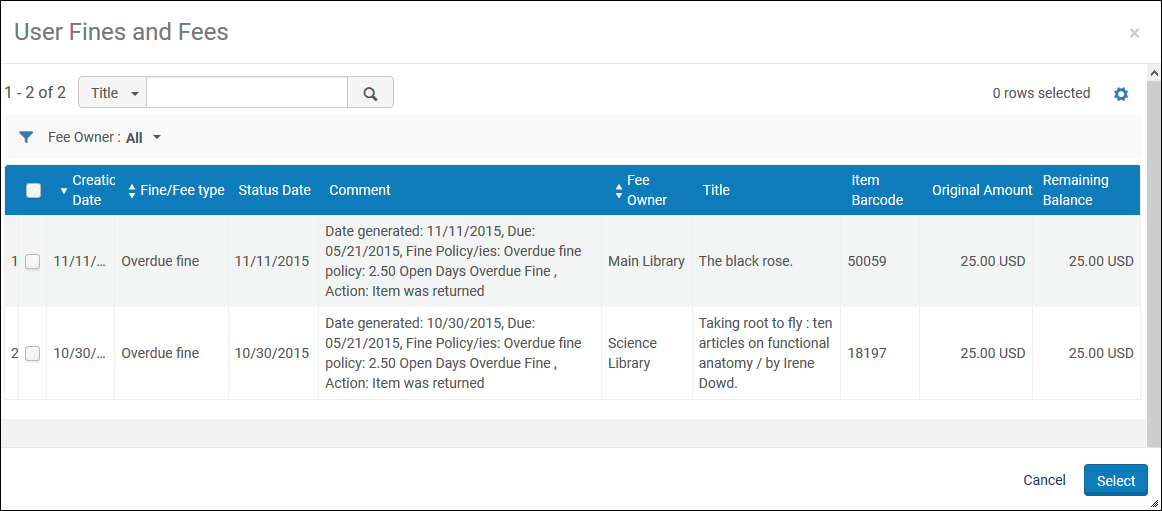 User Fines and Fees Page
 - Select the check boxes of the fines and fees that you want to pay and select Select. The balance of the selected items displays in the User balance field.
 Patron Details Dialog Box – With Balance
For more information about paying specific fines and fees, see the Pay Specific Fines and Fees video (5:02 mins). - Select the Browse icon to specify the specific fines to be paid. The User Fines and Fees page appears. You can filter the fines and fees display to show only fees for a specific fee owner in the Fee Owner filter.
- In the Payment method drop-down field, select a payment method (such as Cash, Check, Credit Card, Debit Card, or Online). For information on online transactions, see Recording Online Payments Manually.
Payment method options can be customized. For example, you can change the Check option to Cheque. To customize payment methods, contact Ex Libris Support.
- Select Add change to balance to indicate that when paying an amount greater than the balance, a credit is to be generated for the extra payment. If this box is not selected, the system returns the extra payment to the patron.
- In the Payment amount field, enter the payment amount you are receiving.
- In the Transaction ID field, enter a transaction ID.
- In the Comment box, enter descriptive information for the fine/fee.
- Select Send and then select Confirm in the Confirmation message dialog box to pay for the fines. The Patron Services page appears and displays the updated balance.
You can also pay specific fines/fees in either of the following ways:
- Self-check machines – If the self-check integration profile has been set up with the Extended Fines and Fees extension type, the SIP2 Fee Paid action can receive the following field pairs:
- BZ – Payment transaction number, to attach to payment section
- EK – Fee to be paid
- Web service – See https://developers.exlibrisgroup.com/alma/apis/users.
Topics
Comments (0)
Contact Us
For further assistance please contact our Help Desk.